Things have slowed down here at the Museum this week because of the great snow storm of 2009 in Asheville this past weekend. We have finally seen the remaining snowed-in staff members this morning (yes, Day 6) and have almost exhausted our snow horror stories. Who had power? Who made snowmen and sledded down the neighboring slope in a kayak (me)? Whose cars are still covered in 20 inches of snow?
.jpg) And from all of us at the Asheville Art Museum, we wish you a warm-electricity filled, snow angel making, crazy sledding time over the upcoming Holidays- and into the New Year.
And from all of us at the Asheville Art Museum, we wish you a warm-electricity filled, snow angel making, crazy sledding time over the upcoming Holidays- and into the New Year.


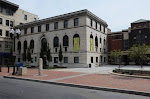
 Today we are hanging Lorna Blaine Halper's solo show at the Asheville Art Museum!
Lorna Blaine Halper was a student at Black Mountain College, a unique arts school located just outside of Asheville. Although it lasted only 24 years, from 1933-57, and enrolled fewer than 1200 students, Black Mountain College launched a remarkable number of the artists. The Museum is dedicated to collecting and preserving the art of Black Mountain College and continues to expand its Black Mountain College collection.
According to Assistant Curator, Cole Hendrix, Halper's "visual practice became dominated by an obsessive, introspective and sustained meditation on the line. Throughout her career Halper continually played with the terms of seeing, manipulating value, tone and scale to evince the descriptive qualities of line."
 Lorna Blaine Halper: The Space Between is going up in the Museum's Community Gallery on the first floor. It is split by the Museum shop so both spaces have to be considered apart from each other and also together within the larger context of the show.
 The Curators and Registrar/Preparator determine where the works should go, taking into account shapes, sizes, themes, and colors so that the pieces flow in a logical and creative way for optimal viewing. Then, the Museum's Executive Director considers the placement of the pieces, making changes as

necessary. Afterwards, the prep crew measures and hangs each piece on the wall, securing each side for added strength. The wall text is then placed onto the wall in the appropriate places and the exhibition is ready to open to the public.
Come out and visit this exciting exhibition!
Image Credits:
Lorna Blaine Halper, Untitled, 1965, oil on canvas, 34.13 x 48 inches. Gift of Lorna Blaine Halper.


 Basic Paste Paper Recipe: